Keeping Your Drain Unclogged With a Homemade Clay Glop Trap

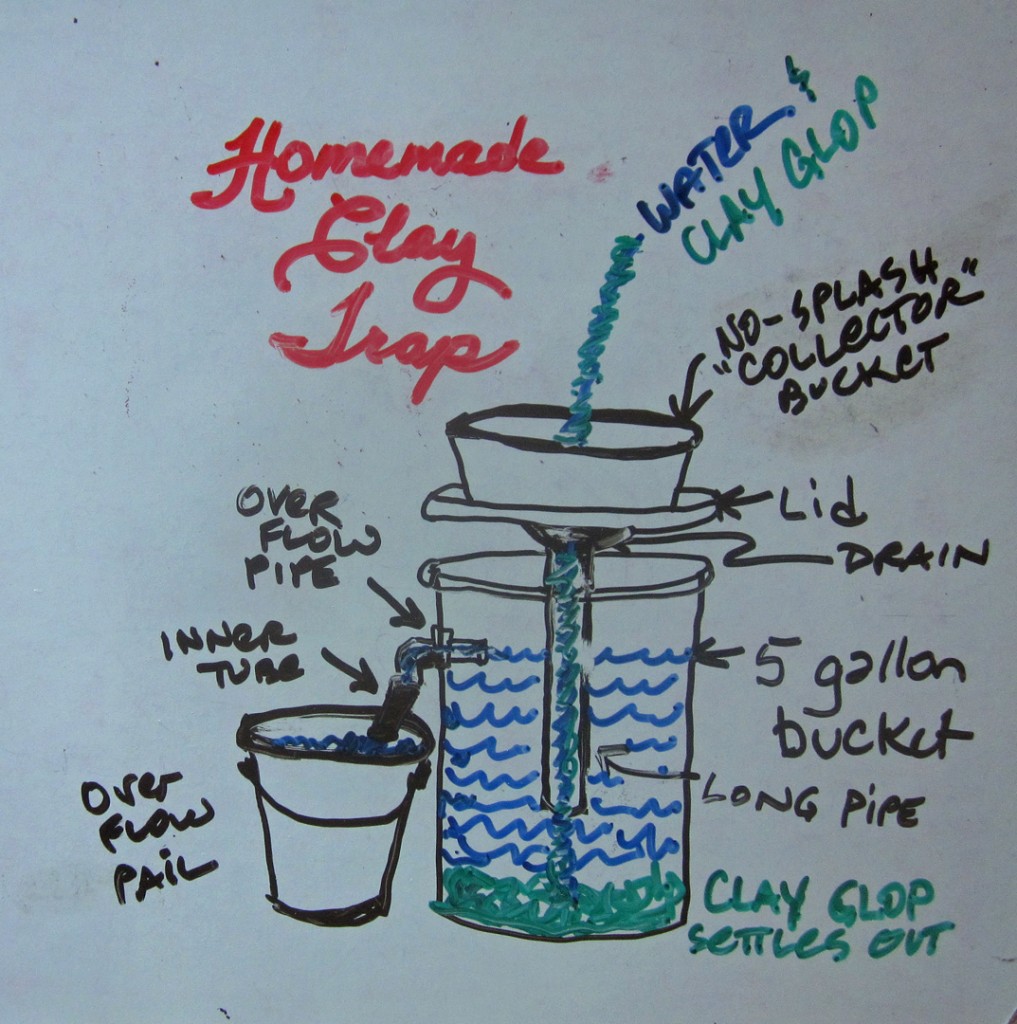
HomemadeClayTrapGraphic


I have no running water in my studio. I like it that way. Being a ceramic handbuilder, I work fairly dryly and clean up often, but, even for me,  there comes a time when the water bucket needs changing. And, if you didn’t already know, clay and ceramic materials make serious sedimentary glop.

For over a decade, I have drained my bucket carefully into a sink (usually the kitchen because there isn’t one in the laundry or garage) and taken the slippy gloppity-glop stuff out to the trash and wiped the water bucket out with a rag,

I coveted Gleco Traps and even The Cink , thinking that when the laundry room got reconfigured, I would install one or the other and be relieved of a certain sort of well-founded guilt.

So, yes, it was just a matter of time for the kitchen sink to clog due to my slovenly clay glop-dumping ways, even if I was careful.Read More >

Share this:

I Just Deleted 10,789 Picture Files


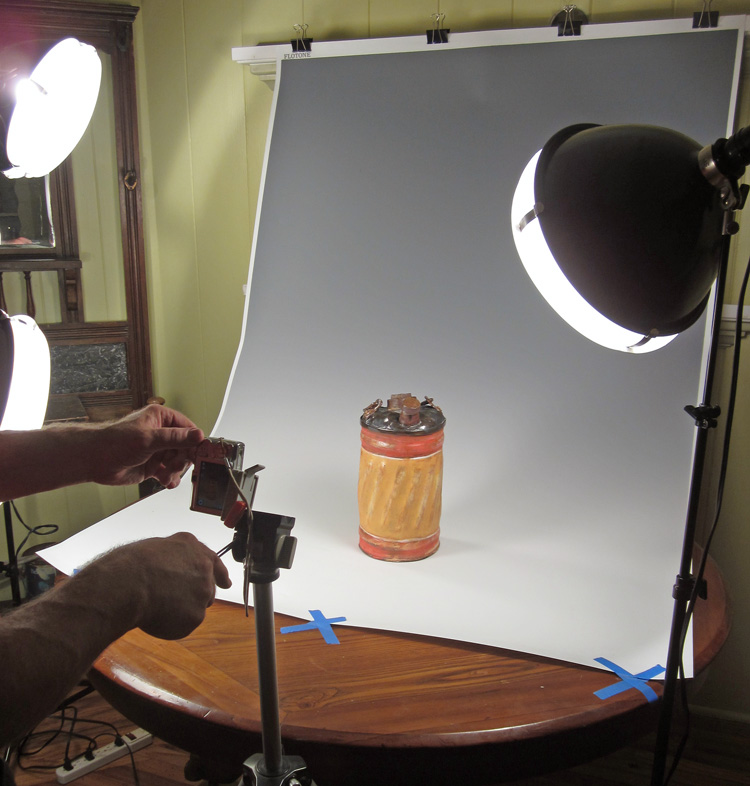
Photoshoot

And, yes, it was on purpose.

Since I got a digital camera, like you, I have been taking lots of photos. And not really curating them. They were overwhelmingly of my artwork – in many angles, backdrops, settings, styles – and took up the lion’s share of the room. But, as a full service artist,  I also had a lot of backstory, process, documentation, activity, marketing and adjunct photos.

None of it was very well organized. The folder trees were serendipitous. I knew where to find stuff by rote – most of the time. I promised myself I would straighten it all out “Someday.” And that Someday proved to take a couple of months to execute.

I was wise to stall on this. If I knew what I was getting into – and I blessedly did not – I might have never attempted it.Read More >

Share this:

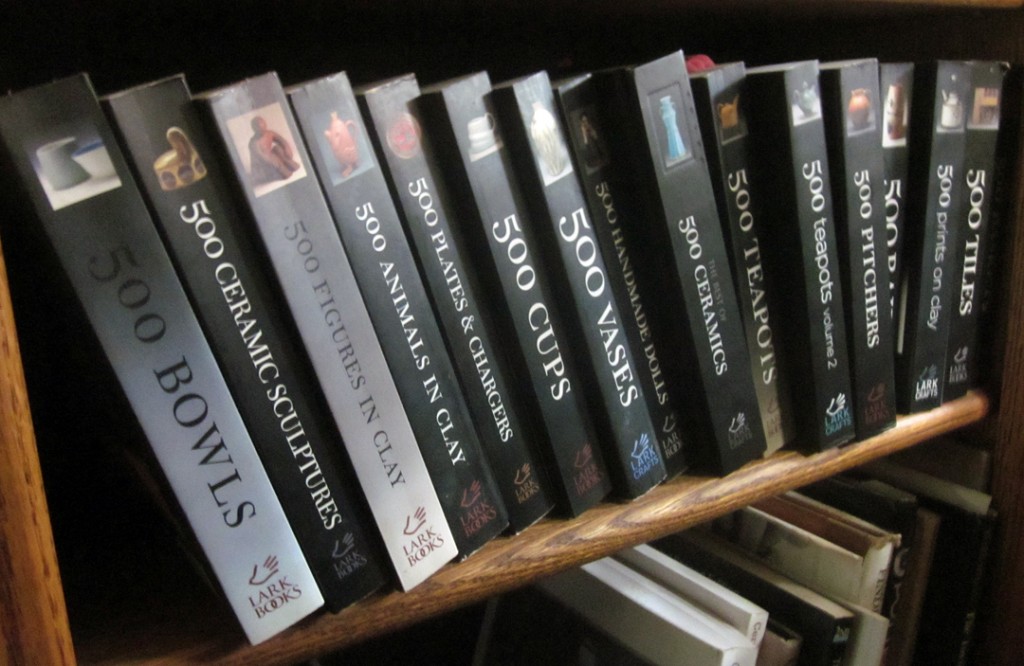
500 Books and Two for the Desert Island


I love a wall of books. It unfailingly rightens and reassures my weary, distracted world.

Not just anyone’s wall will do, though.  I need my hand-selected wall: that mish-moshed reflection of personal passions and meaning,  in which each volume has survived at least one of my annual-ish purges, if not decades of them.

While I gather new books often, I let go of plenty. Some go to the local library, some to trade at Logo’s, the local used book buyer/seller. (Where I easily spend my cash and trade-in credits on more.)

Novels and pop culture bestsellers – if I don’t request them from the library – tend to come in and go out.

My keepers?  Vintage tomes, family works (yes, I’m related to more than one published author) and Art: history, artists, philosophy, creative process and technique, i.e. reference books.Read More >

Share this:

The Start to Finish Task List for Executing an Exhibit, Show or Sale


This post wanted to be a list and ONLY a list. It has graciously let me write a short explanatory intro.

This was going to be short little prose jaunt through the highlights of what I do, start to finish, to pull off a live in-person show and sale of my artwork. As with nearly all my posts, I began by jotting down talking points and a sketchy outline of my main ideas. Typically I free write and then edit heavily. I add images and links, read the preview, make a few more tweaks and… publish!

This post didn’t want to do that much – it became a terrorist demanding I look straight into the camera and stick to its minimalist script. It begrudgingly let me post an image.

Without further annotations – any one of which could be a separate post –  here it is.


The Decision to Participate and Apply

The Meeting of the Application Specifications

The Waiting

The Acceptance E-Mail or Letter

The Event’s Further Instructions

The Planning of the Work to Make

The Making of the Work

The Culling of the Work Made

The Paperwork! Oh, the Paperwork!

The Photographing of the Work

The Inventorying of the Work

The Pricing of the Work

The Display Space and Props

The Purchasing of New Supplies, Signs and Props

The Defining of the Expected Visitors

The Designing and Ordering of the Postcards

The Social Media Promotion Support and Sharing

The Mailing of the Postcards

The Countdown and the Packing

The Portage of Work and Displays

The Arranging for the Artist’s Clothes and Comfort

The Care and Feeding of Artist and Her Support Team

The Obtaining of the Swag and the Goodies

The Setting Up of the Display Space

The Interacting with Actual Visitors

The Talk Talk TALK TALKing

The Needed Stamina

The Money-handling

The Wrapping

The Display Freshening

The Pick-up and Re-packing

The Re-Inventorying

The Bookkeeping and the Banking

The Thank-you Note Writing and Posting

The Email Answering

The Mailing List Updating

The Postmortem Assessment

The Pre-Planning for Next Time


–Liz Crain, a hard-working ceramic artist who now understands why she might get tired sometimes.

Share this:

That’s the Way the Animal Cracker Crumbles


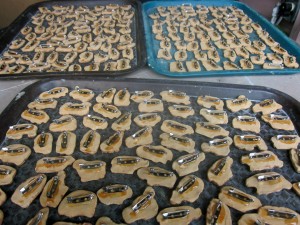
It starts with the intention to make molded clay animal cracker pins to raise money for Cabrillo College’s Ceramics program and ends with….ceramic animal cracker pins that do just that.

But the journey is the interesting part. Not the noun what, but the verb how.

Let’s enjoy the fascinating loop-de-loops, curious sidetracks and obtuse angles to get there, learning a thousand things that don’t work on the way.

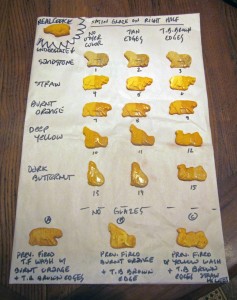
At first,  testing to find the best approach:Which clay?  Body stain or not? Oxide washes? Underglazes? Glaze? Testing, testing, testing. Always comparing the results to a real sample, which is surprisingly ORANGE toned. Important, too, are the molding methods and whether or not to add any clear glaze. (In this case, no, unless you want frosted animal crackers!) What you see above are the first efforts, which admit a bunch of possibilities, most of which prove unsuitable. Next slide, please!


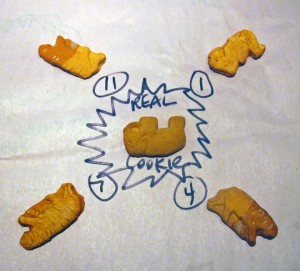
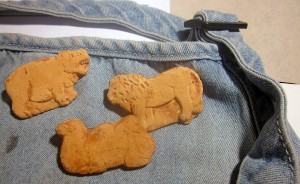
After a few more trial runs and notes, the Final Four Finishes (ignoring the clear glaze on some of them) sit alongside a real cookie and ask for comparison. The crowd-sourcing group preferred #4 without the glaze, and so did I,  so that finish was the emphasis in the next round:

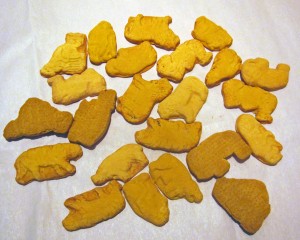
The Final Four Finishes Favorite with an added toasty edging. Could anyone guess the real ones from a random grouping of clay? In this shot the real ones are turned over, but most could not distinguish among the lot beforehand. The closest guesser noticed the excess material at the mold’s edge, not the applied colors. The job ahead was clear: make neat moldings and color them well.


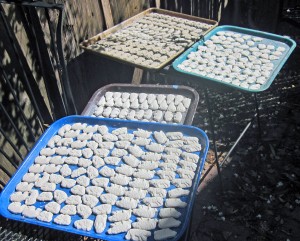
And that’s what I did. Nearly four hundred crackers, pressed and molded neatly. Over twenty of each kind!


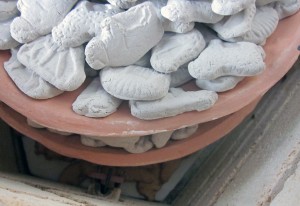
And bisque fired in several tumble-stacked  layers.


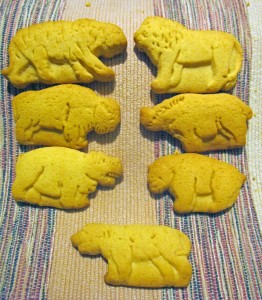
Most of the animal cracker shapes were clear: Lion, Giraffe, Gorilla, Koala. But there was one Mystery Animal. That’s the cracker at the bottom of this photo. Was it a pig? A big dog? A lactating mammal with gills? It provoked a lot of feedback and speculation to my Facebook query. But the definitive list of official Nabisco Animal Crackers appeared from a Friend, identifying it as….. a hyena. Really? Ah so. We also learned that the older molds from older crackers were larger and more detailed than the fresh-out-of-the-box-this-week cracker molds. Ah, profitability.


The task at hand: to color and glaze fire the collection. The sheer volume is daunting. Time to put tailbone on the stool and just get it done.

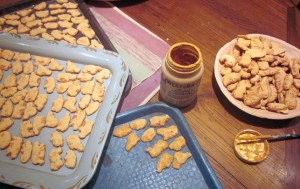
And the first fired round turned out too dark and blotchy! At least with low-fire clay and underglazes, an artist can just re-apply the lighter color treatment and refire. A burnt cookie is a burnt cookie, but a burnt clay cookie mostly just needs color adjusting and refiring.  That’s what you see in the shot above, lightening each one to send back into the kiln once again.


With a successful RE-firing, it’s time to glue on the pin-backs.  Long live E6000, or at least its smell.


A few fully formed, fired, re-fired and fitted animal cracker pins for fabulous fund-raising.

–Liz Crain, who thinks a curiously tenacious work ethic, a few laughs, and raising funds for Cabrillo College’s Ceramics Program are definitely worth the kink in her neck from hours in the same intent position.

Share this:

You’re Better With Better Tools, Maybe.

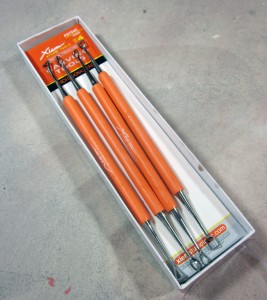
I just spent a small fortune on some clay carving tools. They are stainless steel, nicely shaped, and noticeably weighty, so maybe their price per pound compared to garden variety aluminum/wood tools is the same, or even cheaper. I don’t know. I don’t care.

Sexy-Expensive-Designer tools are a relatively new thing in the clay world – new as in this millennium, really –  because clay is such a primal activity and often just as easily managed with your hands and maybe a stick and a shell. I have a couple of older books devoted to the ancient practice of making your own brushes and tools. I’ve done this.  I think as a group, clay folks are pretty opportunistic and will have fun making a tool out of pert near any ol’ thang.

OK,  now I’m getting silly. Yet I do mean to contrast the down and often dirty home-grown self-sufficiencies of much ceramic work – especially functional pottery –  with an ever-growing arena of High Artistry featuring the precious piece – now considered sculptural – on a well-lit pedestal in a hushed gallery. Could this paradigm-shift extend to the tools as well?

As usual, I sit somewhere in between and am not above cutting an expired plastic card into a shape I need to texture my clay. Yet  I am equally amenable to paying $30 for four sassy-orange, very nicely engineered and name-branded cutting tools.

And why is that? To my mind, tactility rules, not aesthetics. How does it feel? Does the extra heft improve my performance? Do the insanely precise loop shapes cause me to take more care when I make a cut? Do I clean these tools more often because I respect not only their excellence but their cost? Maybe that’s all true, and yet…

Am I buying mystique? What or who is the maker/seller Xiem?  I know it’s a clay center/gallery in Pasadena where a few years back I was rejected for a show by the mythic Paulus Berensohn. I figure he gazed upon the slides – yes, slides! – of my pathetically unevolved work for a few seconds, and then sent the loveliest personally hand-written rejection email an artist is ever likely to receive. Other than that, Xiem has a certain panache and stretches like a heirloom sunflower towards a stylistic sensibility I’m not quite sure I fully share,  having one foot as I do on the opposite bank of that crik,  being a homemade tool-maker and all.

Am I buying Xiem’s tools because I’m a sorry-ass toady wannabe?  Nope. At least I’m sure of that! I bought these tools because they felt right in my hands.  I hoisted their remarkable heft, noticed the eight cutting shapes and their sharp beveled ribbon edges and knew I held excellence. Excellence I could extend into my work. These babies are just gonna HUG the road!

I have a lot of tools, but like my first Cabrillo SummerArts instructor, Una Mjurka, I return to the ones that do their jobs simply and well. Una had reduced her tools to mainly an all-purpose wooden stick and a favorite brush. She’s good like that. I’m almost there. It’s a practice, sort of a ceramics studio version of the Zero Waste Home. I have my personal stick and brush, and I know purpose and supreme function wherever I encounter it. Why bother with gizmos?

So the Better Tools Search comes with a caveat: what’s better for you? What do you need to make? What will facilitate that?  What do you need to jettison? Will this new tool facilitate your crafting more than any tool you already possess? How will you justify the cost,  of either your time spent making it, or your cash spent buying it? I can both recommend and un-recommend these Orange Beauties. Depends on what you want. But if you ever get to test-drive one, do it!

~Liz Crain, a ceramic artist who  – up til now –  swore her Amaco T-9 Sgraffito Tool was the supreme instrument.

Share this:

Facing the Faces: The Reality of Real Art, Real People


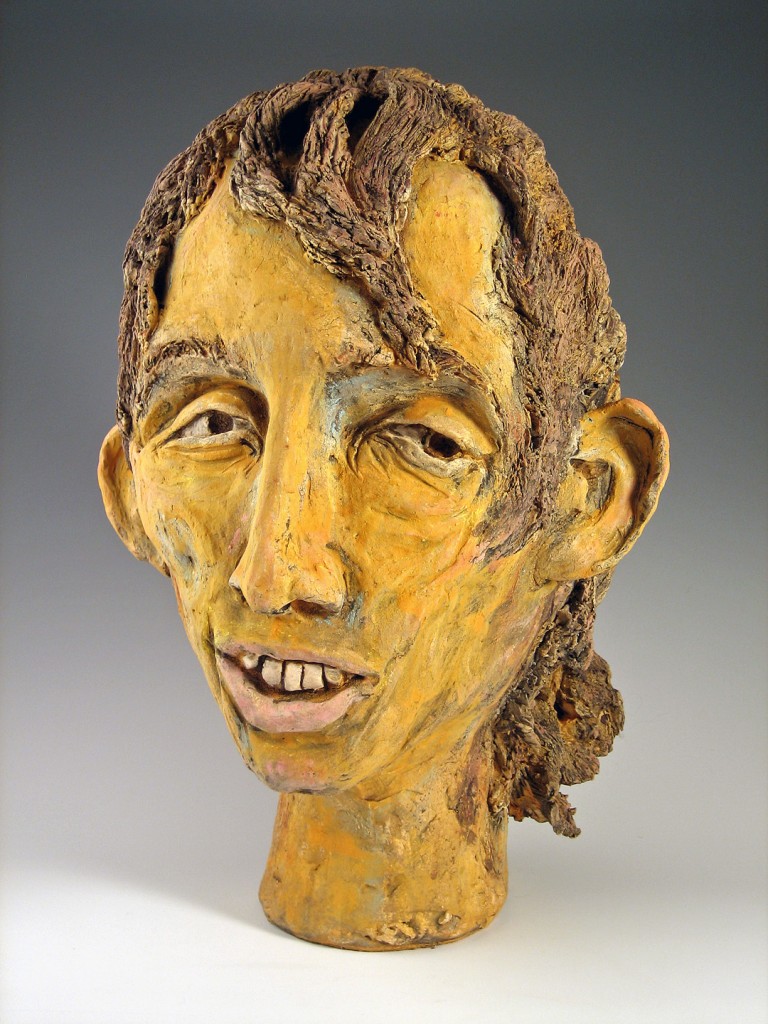
There’s a creative pause in ceramic art-making I call “The Bisque Freeze,” and I’d had a nearly two year case of it after beginning the portrait sculpture pictured above. Any manner of hesitancies can feed The Freeze, but they all are sourced from the fear of farking up your precious work with your rotten and unsure decorating choices once you’ve gotten it safely through that first bisque firing.
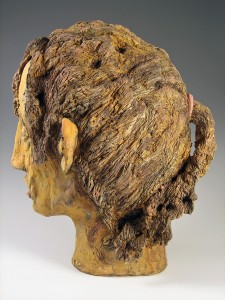
 

This piece was not only the biggest thing I’d made to date, she was both fearsome and delicate. Here’s a side-view showing the thin porous ponytail in the back. Lots could go wrong, but it can with any piece. With this it would just go wrong in a bigger way. I spent those paused years making other things and occasionally wondering how and when I would get back to the baby elephant in the clay studio.

While I had learned the Big Head construction methods in a two-week summer workshop with the energetic, affable and very clear instructor, Stan Welsh, he understandably did not cover finishing techniques, as the works needed at least a month to dry afterwards. Two summers later, under the surefooted guidance of the energetic, affable and very clear instructor, Tiffany Schmierer, I learned the underglaze wash and dry-brush methods that matched what I’d had in mind for the piece all along. Or more to the point, I learned about being bold and fearless once again in the face of The Bisque Freeze.


Two related asides before I continue this saga.

First, a lot of my ceramic faces are caricature portraits. To me that means that something about the very real countenance of a very real person catches me up and I find myself portraying that response in a face jug (a la my Local Talker jugs) or a portrait bust. Usually I work from a photo and only have the one view, but that’s enough and I am free to interpret the other attributes. Sometimes I go Classical Greek style and emphasize the ideal, but mostly I go Roman Republic realism,  showing the gritty detail to reveal the unique character.

In that summer workshop with Stan I made two big heads, one a rather repulsive stuffed-cheeks hot dog contest eating champ, nearly ready to spew. The other, this compelling wistful anorexic woman,  proudly sitting for her formal portrait because she was getting healthier. I don’t recall noticing the name or other info with the photo I found back then, just this: “She’s in recovery and gaining weight.” It’s the reason I could bear to explore her pained, skeletal features, because she was hopeful and proudly representin’!

Second,  when I finally felt I could approach adding color to this Major Work, I stood it on a wooden table outside, hosed it off well, let it dry in the sun and covered it with thin washes of color, happily building up the surface information and modulating areas for values, tones and interest, deep in relationship with the persona.  I was lost to my work, unaware of the handyman who’d been around a few days helping to dig a trench for new gas and drainage lines down the whole side of our house.  Later that evening my hubby reported that after seeing my piece and watching me work,  he had exclaimed with a bit of incredulousness, “Geez, when you told me your wife was an artist, I didn’t think you meant a real one!”

I’ve chuckled over that unvarnished Emperor-has-no-clothes honesty ever after; without question the finest validation out there. It’s about being deeply, undeniably real in all ways possible, even when real is still a completely squidgy interpretation. Me. The Subject. The Art. The Viewer. Real as real can be. So real, even the handyman acknowledges it.

Even though I’ve drifted away from making faces and figures for the time being, I still heartily enjoy them. Recently I’ve rekindled the dialogues with my portrait work as I gathered my collection of Ugly Jugs, Skull Jugs, Character Face Jugs, Local Talkers and Portrait Busts in order to display them from now until the end of April, 2013 at the Scotts Valley Library in an Art at the Library group exhibit entitled – of course – “About Face.”

As part of the renewed conversations with these pieces, I wondered if after 5+ years I could re-locate the source photo for “She’s in Recovery” and went googling around. It’s all so much easier now and I not only found it many times over, I learned her name, I learned her fate.  Her name was Kate Chilver and she lost her 19-year battle with anorexia at the age of 31 in 2011.

~Liz Crain, who is profoundly glad she made this portrait bust of Kate Chilver, who’s name and struggle are fondly and respectfully acknowledged.


Share this: