Stop Look Do


A front window of Good Life Ceramics,

A few years ago, my friend and clay buddy John Albrecht sat me down and described his passionate idea for a new clay place. What he outlined back then was not just ambitious, it was a little outrageous. It would be a place, he said, that reached out to both clay diehards AND clay newbies. It sounded like my kind of theme park: excellent facilities, enticing projects for spontaneous drop-ins, members’ studio space and privileges, local clay artists available for consultations, date nights, movies, interesting flex hours. Oh, and a gallery with exhibits and work for sale.Read More >

Share this:

Tales of the Workshop: In Which Art and Spirit Meet the Creative Process in a Clay-Collage Mash-up


The Workshop  Art and Spirit led by the venerable Coeleen Kiebert, is a way to access and define one’s creative vocabulary, personal imagery, art-making process and style. Held at her stunning sea-view ceramic studio in Rio Del Mar – which also manages to be intimate and comforting – we found sharing, guidance and time for insights. While I’d taken this course in a longer format over a decade ago, it simply can’t be called a repeat; I am just not the same artist as when I first learned these methods. My goal was to arrive with as few expectations as possible, stay in the moment and tell the truth. Oh, and to circle back around to the intelligent, protective energy that Coeleen provides. What a week!

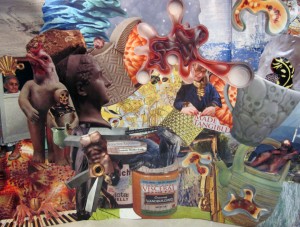
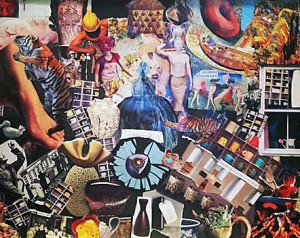
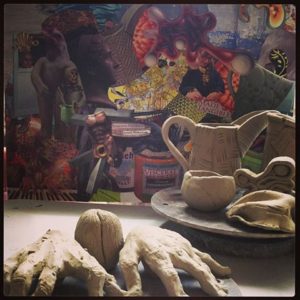
Day One: Re-steeping myself in Coeleen’s descriptive creative process and beginning again with the making of a found imagery collage on a huge 18×24 paper support. We are silent and it takes hours finding the pictures and words to select, where to place and interrelate each piece.  The collage-making proved intuitive and I did not over-think it.  Coeleen suggested we pause and look for evidence of the four elements in our imagery and colors.  I found tons of Earth (natch), reasonable amounts of Fire and Water, but almost NO Air. When the seabreeze kept lifting my unattached piles of papers and blowing them upside down and into different arrangements, I decided that Air was playfully present and I did not need to try to represent it with imagery. I dreamt of my images that night and returned in the morning to attach the last ones before we gathered to share and respond.


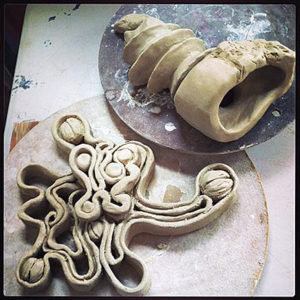
Day Two: Collage completed,  Coeleen introduces The Map, a conceptual grid of thirds which aids in interpreting our images by where in the rectangle they have been placed. The grid includes a continuum from unconscious to conscious, higher and lower realms, fears, undeveloped concepts, dreams, outward and inward movements, archetypal and Shadow areas.  What images and colors did I repeat or put in prominent positions? What meanings can I pull from them, literal, analogic and metaphoric? These represent a language I think in: a glimpse of my image vocabulary. She suggested we pick three images and fashion them in clay,  recommending that one of them be an image we don’t quite understand or are disturbed by.  I started with the piano-playing hands and the seed image from the lower left, then went to the straight-forward ceramic pitcher, the vessel near the center.  Side pieces appeared, but it was great to work with clay independently of needing it to have any sort of outcome: just be there and be attentive and responsive to what comes up. I could not decide on a third piece, but slept on it.


Day Three: In the morning I quickly made two clay pieces from collage imagery I did not understand. They were curvilinear and abstract,  and I wound up liking both really well, even if I still didn’t quite get them.


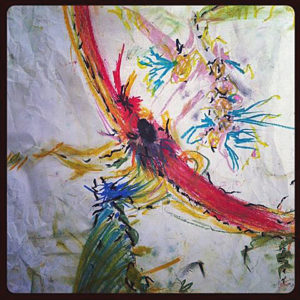
In the late morning Coeleen guides us to The Doodle as way to access a personal style. We have a few warm-up doodles and we’re off for an uninterrupted time, moving the oil pastels silently and goal-lessly over the page however we like. And, yes, it IS touchy-feely in just the right way: a supremely visceral and kinesthetic experience for me. Outcome is not important, but I do find myself wondering what the page “needs” to express itself: Another color? Another series of marks in this corner? It was a dialogue. We hung our doodles next to our collages and began to notice similarities of colors and patterns,  the division of space, the energy expressed. The collage and doodle processes are so different, and yet the results are clearly cousins!


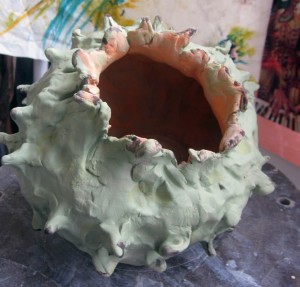
Day Four: Time to doodle with the clay!  Grab a grapefruit-sized lump of clay, work with eyes closeddoodling in 3D for at least 15-20 minutes, open your eyes and continue working.  Out came this giganto spiky pod thing! What is similar here to my previous collage and doodle imagery? What has evolved? Insights? I’m beginning to think I enjoy seed pods and potential growth more than I thought I did.


Day Five: This last day is dedicated to refining the clay pieces and making one last foray into something we each wanted to understand better. I found myself making another collage. In this one I specifically was asking to understand what the concept of vessel means to me. The night before I had looked up all the meanings of the word, so I let myself find the right imagery for ships and veins and containers, even metaphoric ones as in, “He was a vessel of the Lord.”  I placed the new collage next to the old one, with my doodles and clay work alongside. I find only a few connections, and only the ones I had intentionally put there; I’m spent.  But the other workshop folks pointed to one similarity after another, the unity being obvious to them. And obviously I have tons more to apprehend, which I take as a Very Good Thing.


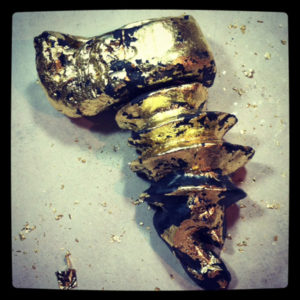
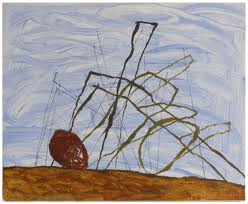
Coda: I took my wet clay pieces home,  finished and fired several.  The one I still don’t quite understand – the screw-like piece taken from the first collage – got a coat of black underglaze and after firing it,  I covered it unevenly with thin gold leaf. The aim is to have it look more like the mysterious gold object (originally an artifact in a National Geographic.) It’s hanging on the wall a glance away, just to the upper left of my monitor, the spot on The Map where dreams reside.


– Liz Crain, who is so happy to be working this way again, she signed on for six more weeks at Coeleen’s studio starting in late October!


Share this:

Thistlethwaite and Haste: Failure as a Metaphor for Success


While I’m busy making other plans for aesthetic awesomeness and cultural dominance,  clay unfailingly reminds me to cleave to patience and humility. To aim high, show up in the studio, stay the course and remain grateful for it all: those bedrock opportunities for excellence.

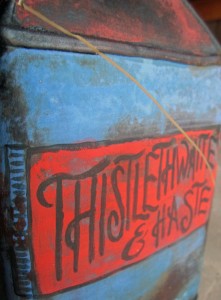
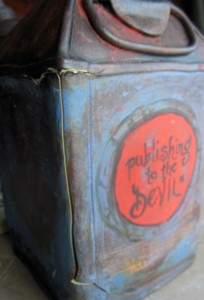
The piece pictured above, the thoroughly cracked Thistlethwaite and Haste, has given me once again an ironically humorous lesson I guess I am doomed to repeat to the extent that I become happy about it.

This re-decorating and re-firing should have been a slam-dunk. I was just adding a fillip or two to a relatively plain piece from last year. It’s something I have done successfully many, many times before, whether as a subtle touch-up or a complete re-do.

Because an important part of my new artistic direction is to make my own brands, logos, slogans and tag lines, I delved deep on the design details and the painting, set it in the kiln, fired it to a ridiculously low temperature compared to where it had already gone…and… opened the lid to an unequivocal failure.

As best as I can figure, there were stresses hiding in the clay. Where, how and why are perhaps unknowable. Maybe they were always there. Was it due to forming issues? (But why didn’t they show up at the first higher temp firing?)  Was it between the tensions of inner and outer surface treatments? (Hmmmm.) The relative speed of the kiln temperature changes? What? While it is good to suss out the reasons for problems, sometimes – OK, often – they just are the way they are…Shrug and go on.

Yet, yet…..The meaning of that title…..

Was there Haste involved? Impatience?  Imperiousness? Maybe.

The clay and the kiln both replied: Thistlethwaite.

Sigh. It’s almost a Jungian dream message.


And there’s more!

Here’s the back.


More evil sproing cracks and that tag line: publishing to the DEVIL.  To do so is to reveal your fond intentions to the wrong person or at the wrong time. Wait, could that mean me? I’ll take it as a kicker, for I think the kiln genie was definitely out dancing with the ghost in the machine this time around.

I will certainly remake this piece in some fashion, maybe a bit more intentionally, with love and laughter. Its ironic title and all the extras I added around the sides make me chuckle, even with those cracks. And that is exactly the Success part of this Failure I am most happy about.

–Liz Crain, who realizes that speaking of all this here may or may not help the Devil calm down and just go along with her plans.

Share this:

Love the Slab You’re With, Part One


Sometimes an activity you encounter meshes with your essence and you melt away into it. A friend explains the basic golf swing and just like that you’re sailing the ball 350 yards at the driving range and they’re saying, “It’s not supposed to be that easy!”

You find your bliss in the swimming pool, the computer lab, a knitting circle: all wonderful fascinations.  You sync with what you already know and scaffold from there, unstoppable in your  heedless avidity.

It’s precisely what happened after I spent a Saturday early last November at the Richmond Art Center with ceramics maven Lana Wilson as she demonstrated her method for coloring and collaging clay slabs and then making stuff out of them. It’s fresh and fabulous and lets the clay be clay and me be me.

When I returned to my studio and fooled around, working from my woefully unreadable notes and her handout, I was simultaneously back in Ceramics 101 trying to wrangle wet-out-of-the-bag clay and was also thrust forward into the freshest color and design possibilities I’ve seen in years. It was unadulterated infatuation and I could not stop my hands.

A bag and a half of clay later (37.5 pounds!) I’ve come up for air. Wow.

This method is clearly about staying in the moment. Loosely intentional. Intentionally loose. Don’t be fooled, though, it’s not necessarily easy. Even though Lana calls herself “The Queen of Low Standards, ” I will explain why that’s a canny ruse in the Part Two post. In the meanwhile, Part One will cover the slab-making.

The Black Side

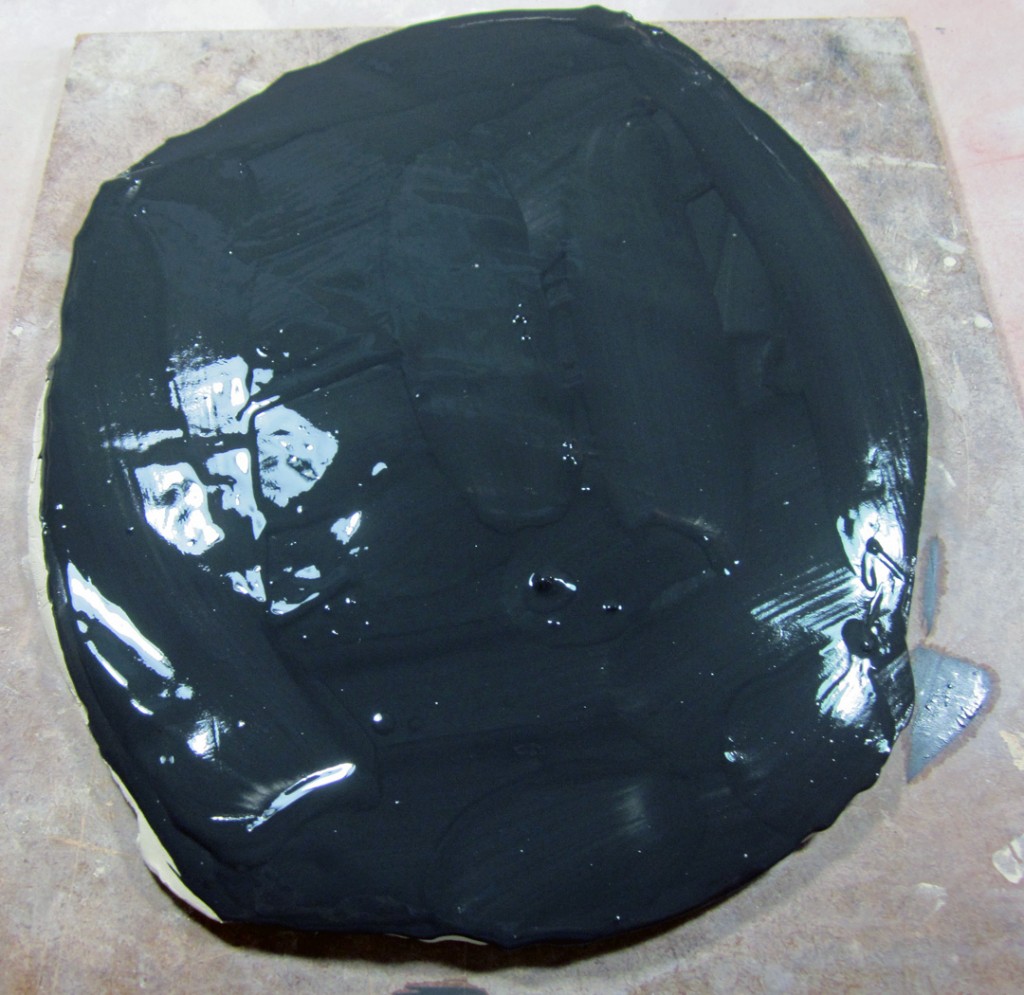
Take a bag of clay  -a white clay is used here, but there are no rules, you get to decide what you like – slice off thick 1″ or so slabs from the long end and throw them down on your working surface sideways to stretch and thin them,  some or a lot, you decide. Or alternatively roll them out on the slab roller. Paint with 1-3 coats Black underglaze,  letting each coat get ‘unshiny’ before applying the next and brushing in alternating directions for evenness.
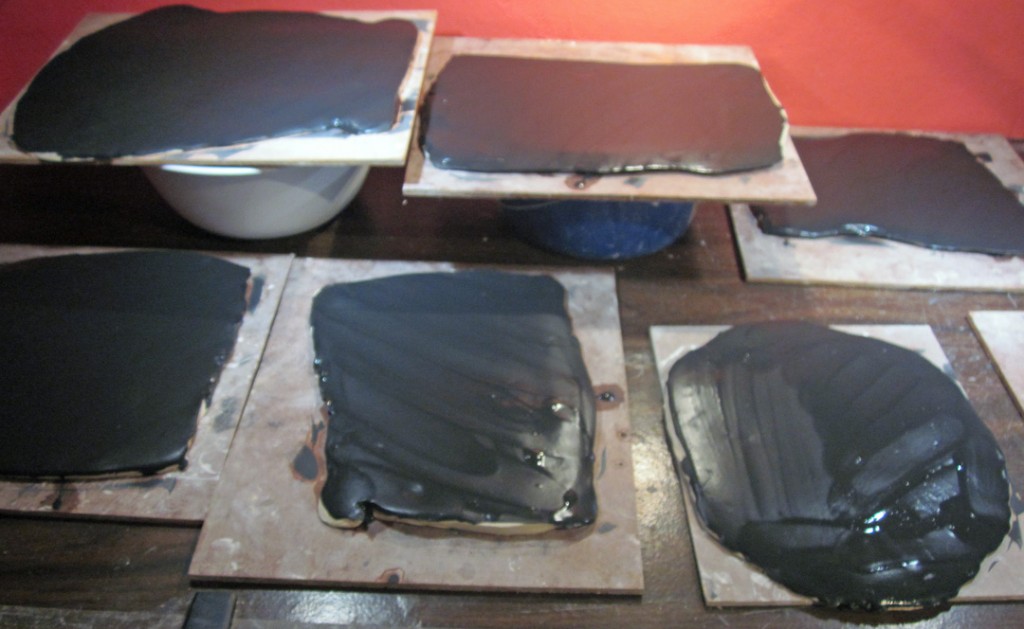


I need to tell you black is not required! Feel free to use any color(s) you enjoy!


When you’ve got enough coats and they’ve nearly dried, try a bunch o’ textures. You know what you like. My favorite from this array was the squares/alligator roller tool (a tenderizer?) but all of them were pretty wonderful, because they retain their character when they’re manipulated, which is coming.
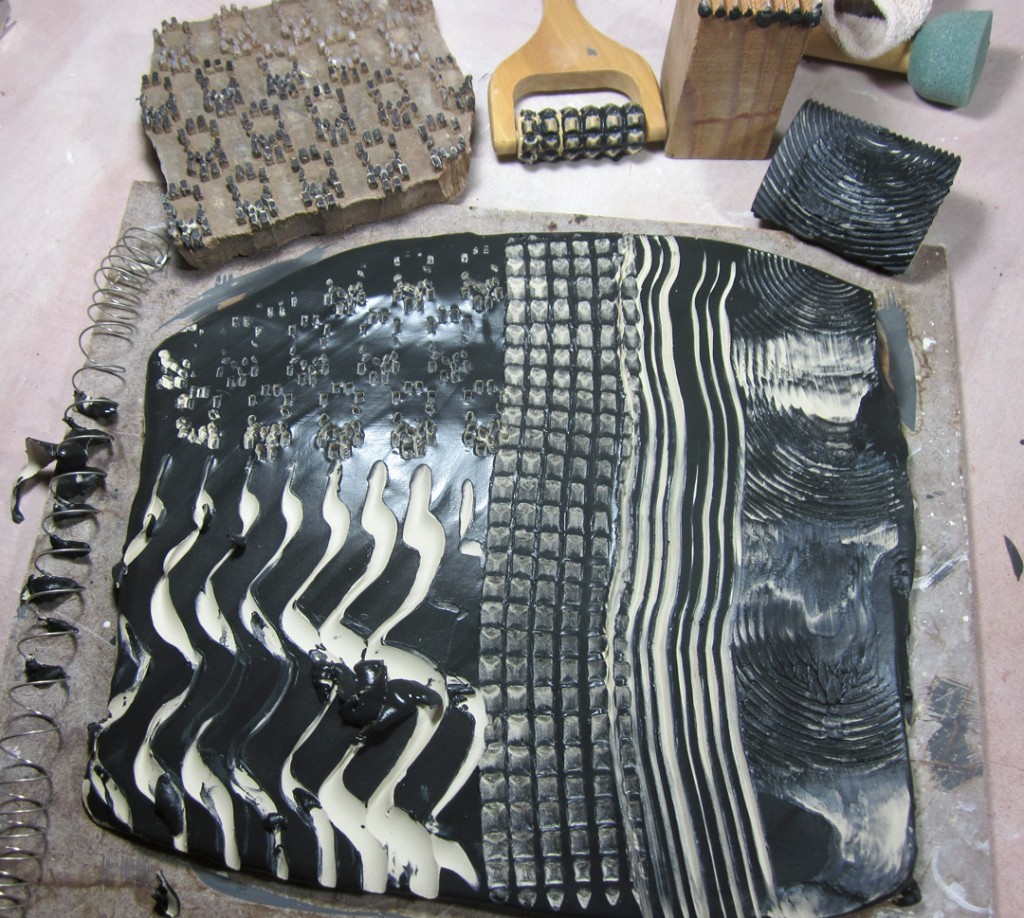


The Colors Side

When your Black Side has set up enough, (or even not…..random markings and unmarkings are most welcome) flip everything over and pick out some underglaze colors to play with.  One to three  coats again, maybe not all the same, depending on what you think you might do for patterning in the next step. You don’t necessarily need to know anything about where you’re headed, though. Adventures for everyone!
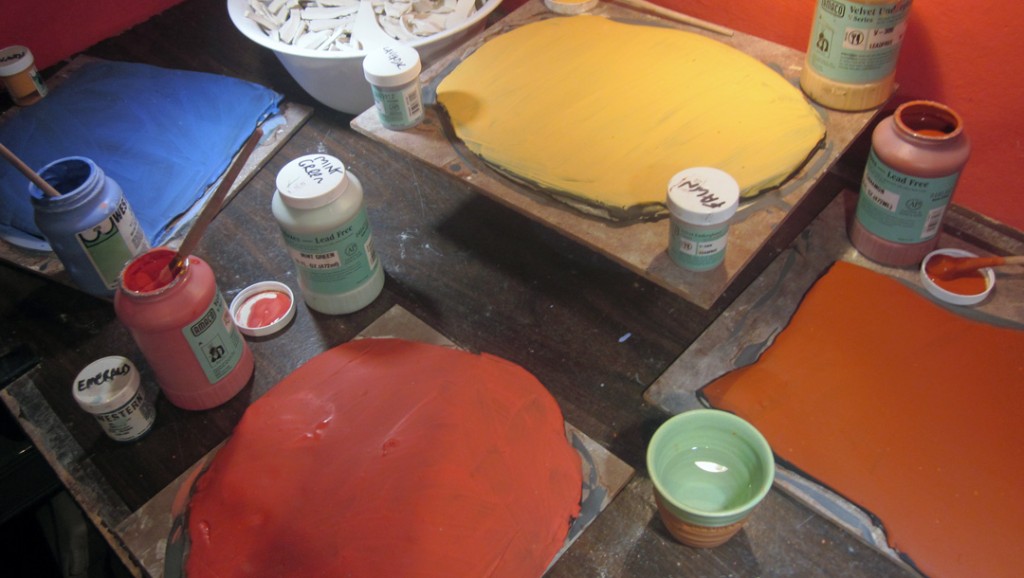


I want to speak to the Controlling Ceramics Perfectionists in the audience – and you KNOW who you are: this process is worth the price of being messy and unclear. (What you might think is evidence of Low Standards is actually a wicked plan for unexpected beauty.) There is no possible way to make a mistake here, so own it: goofs are in your head. You are officially freed from your need to get it right because there is no wrong. OK, end of message.

Now, add more colors, thickly or thinly, with or without patterns. Know that they will change mightily as you work, so you don’t need to commit or invest or even pay exact attention. On this slab, I was playing with round, target-like circles and complementary colors, that’s all.
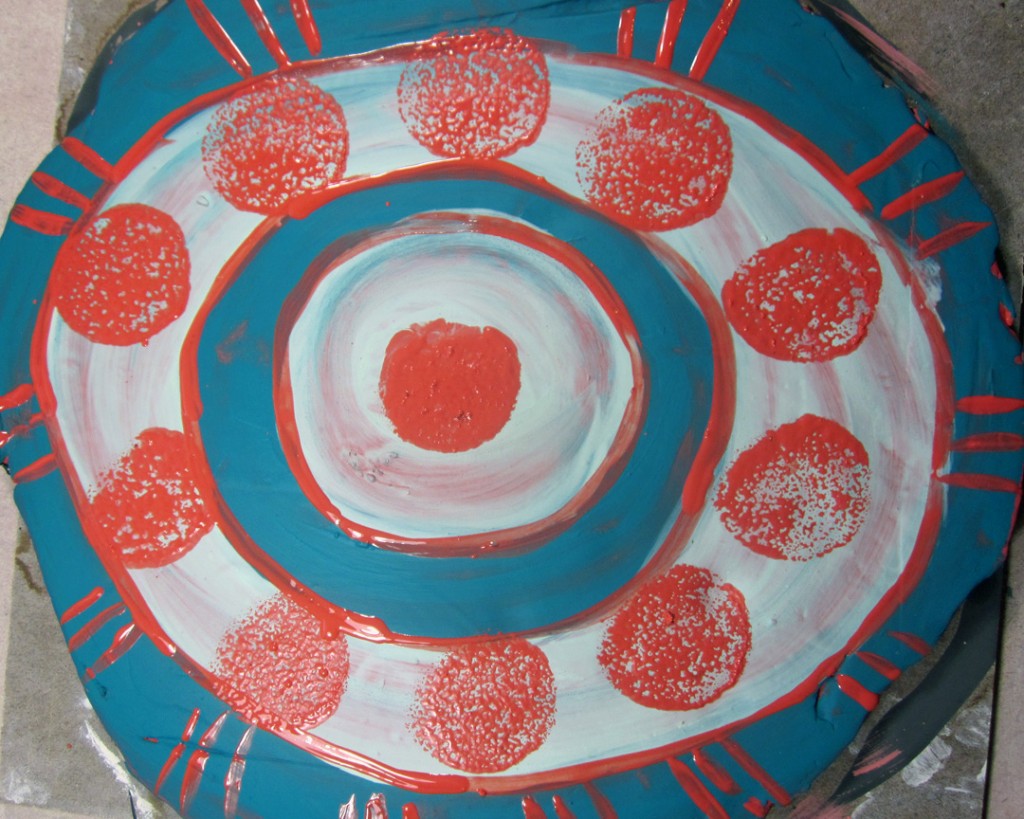


You can also do more texturing and carving as in the black side….I just didn’t here.


Tossing and Rolling

Yes, this is the same slab as the last photo! Gone are my precious quasi-intentional markings.  I threw it out more on the work surface, and it got abraded and messy, even a little more smeary than I expected. (My next batch of slabs was thinner to start with….so there was less smearing as I thinned them. Good to know.)
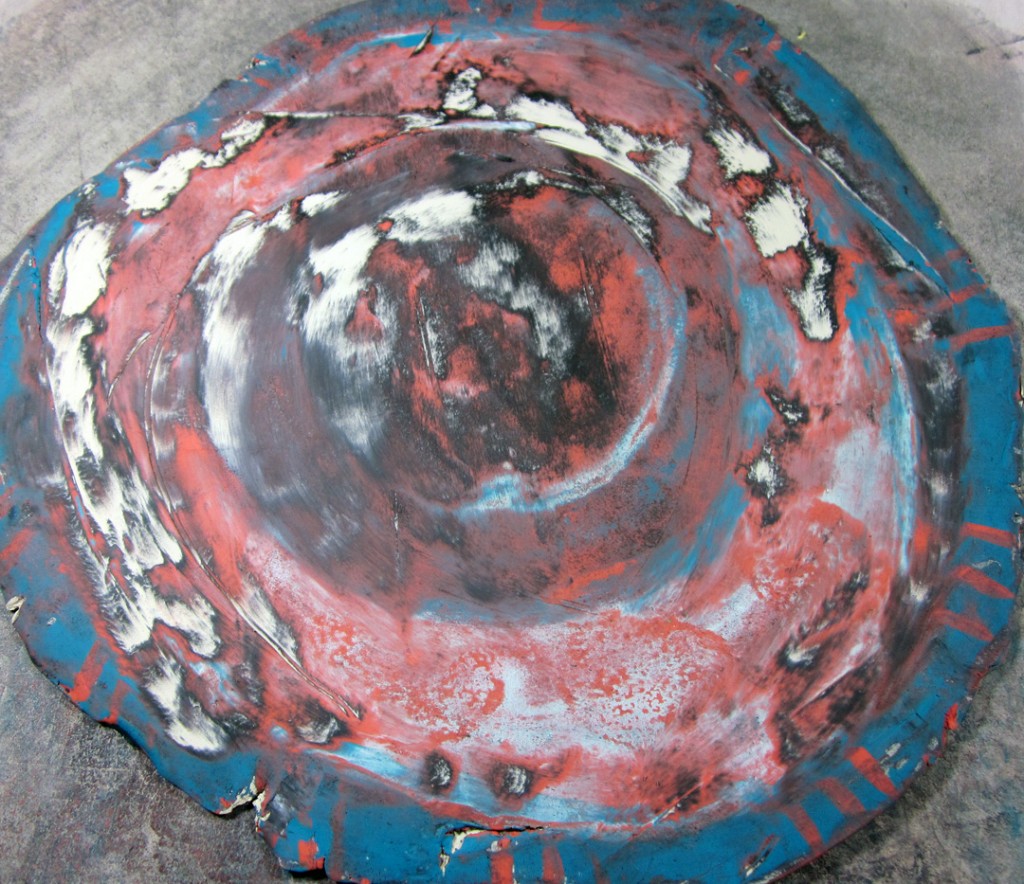


You also can use a rolling pin to thin your slab. Lana  used newspaper between roller and slab. I did a little and then did not. The transfer of colors with both the newspaper and roller is interesting. See what you come up with. You still are doing great.


Cutting and Recombining

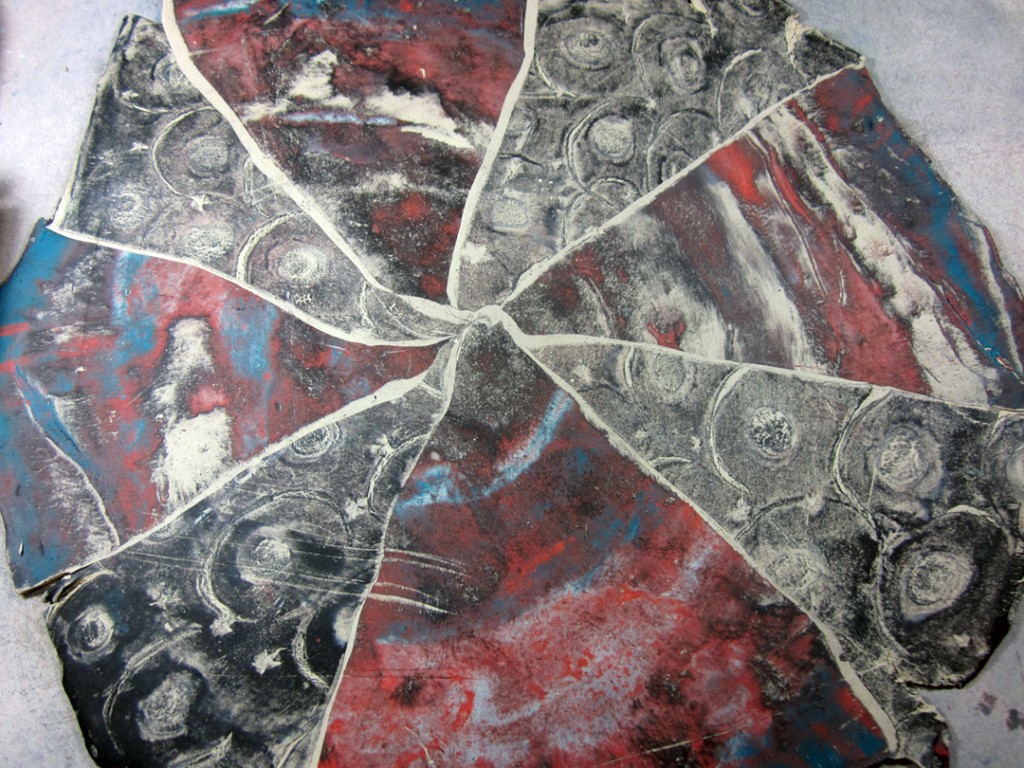
Now it’s time to cut the slab apart and  flip some of the pieces. Cut any old way…this just happens to be pizza wedges, because I’m a radial symmetry aficionado. Try stripes or puzzle pieces. Flip, overlap and roll together again, creating an entirely new collaged slab. The clay itself is still floppy wet and takes to this technique without any resistance. If it got a little dry, just brush each seam with clear water  before rolling.
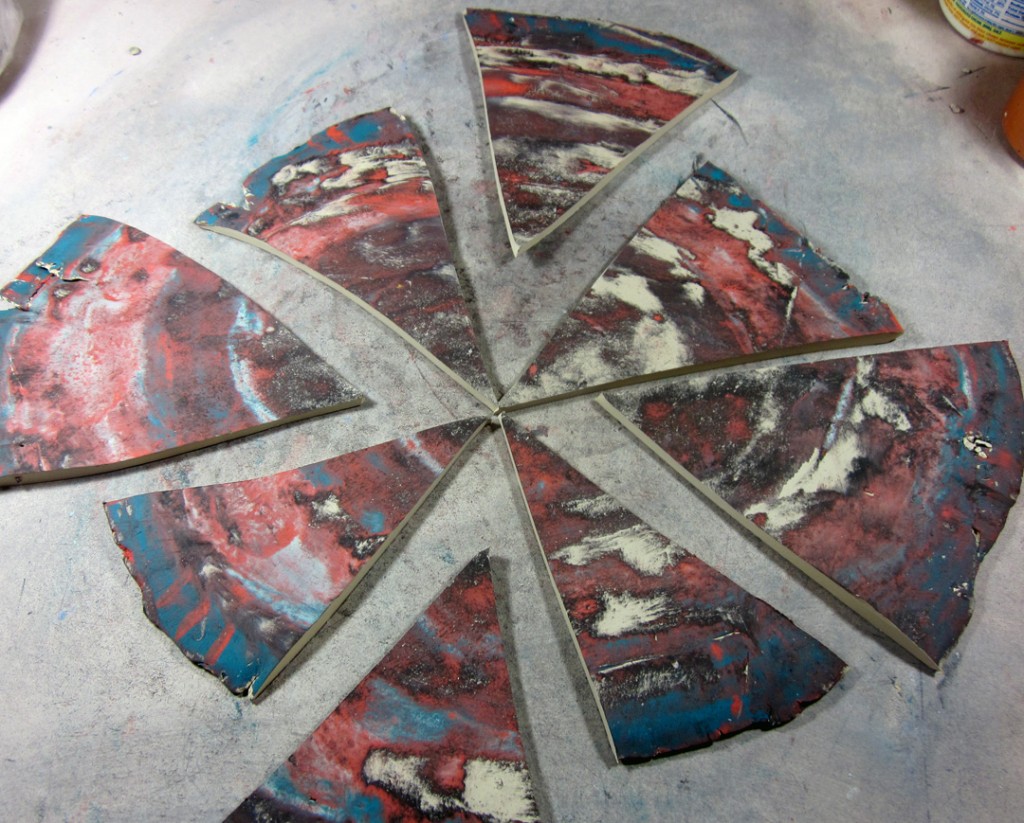


The parallel scratched looking area on the lower left is from inadvertent markings from my smaller roller and/or handling. if you don’t want that, roll lightly.


Cutting and Recombining Again

You can stay with the above pizza-like slab, but you are also free to cut/tear and recombine at will. And it only gets better in my book. Here is a variant, including  thin twists rolled flat at a few of the seam areas. It makes the slab absolutely unique each and every time.
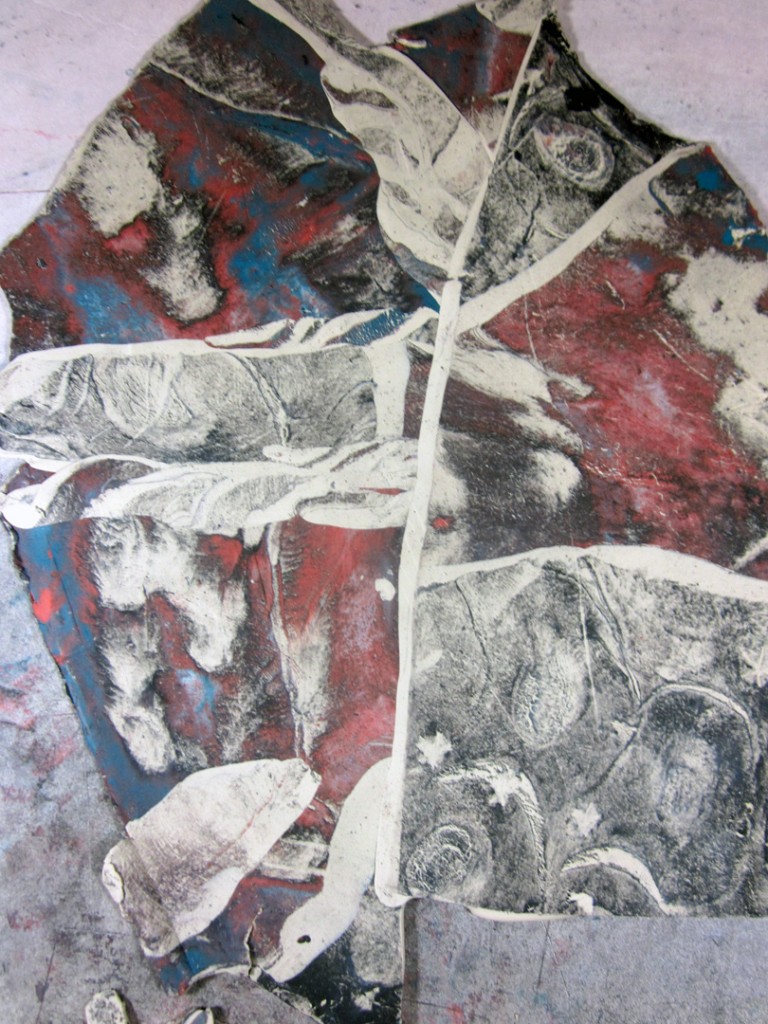


This is the first post about this process. Look for a second post on how to form work from these amazing slabs sometime after the new year!

~Liz Crain, who was as surprised as she could be about this new ceramics method and the freedom it afforded her to reinvent herself and her ceramic process, once again.


Share this:

Making A Press-Molded Wad Pot, A Pictorial/Instructional Essay

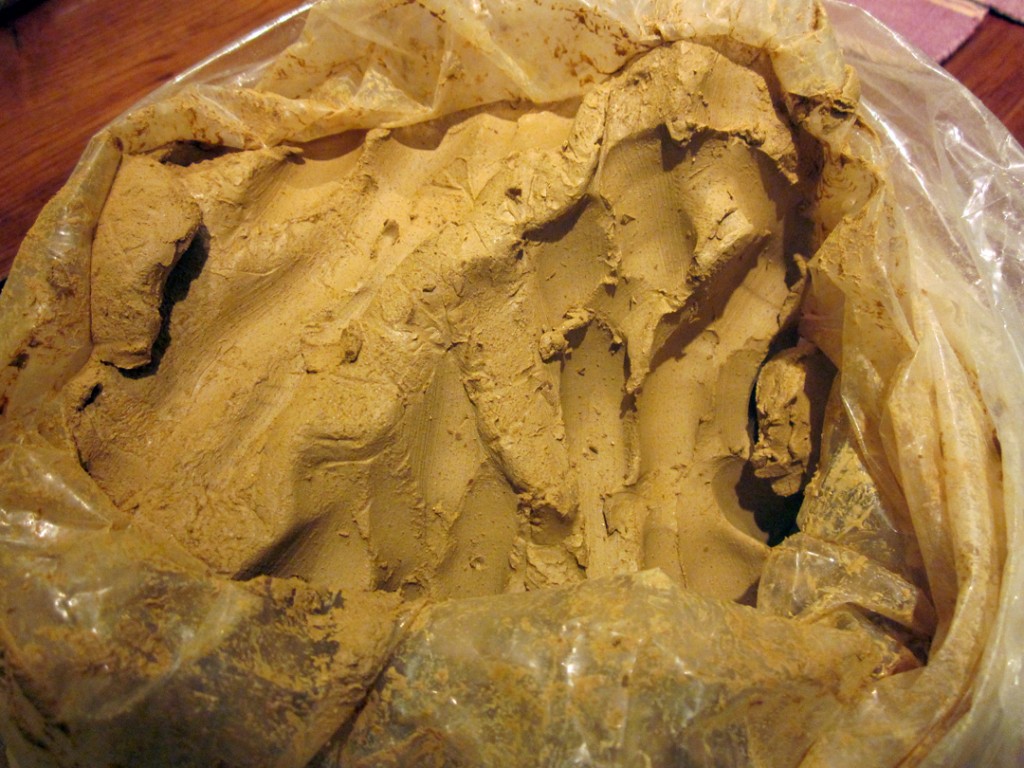
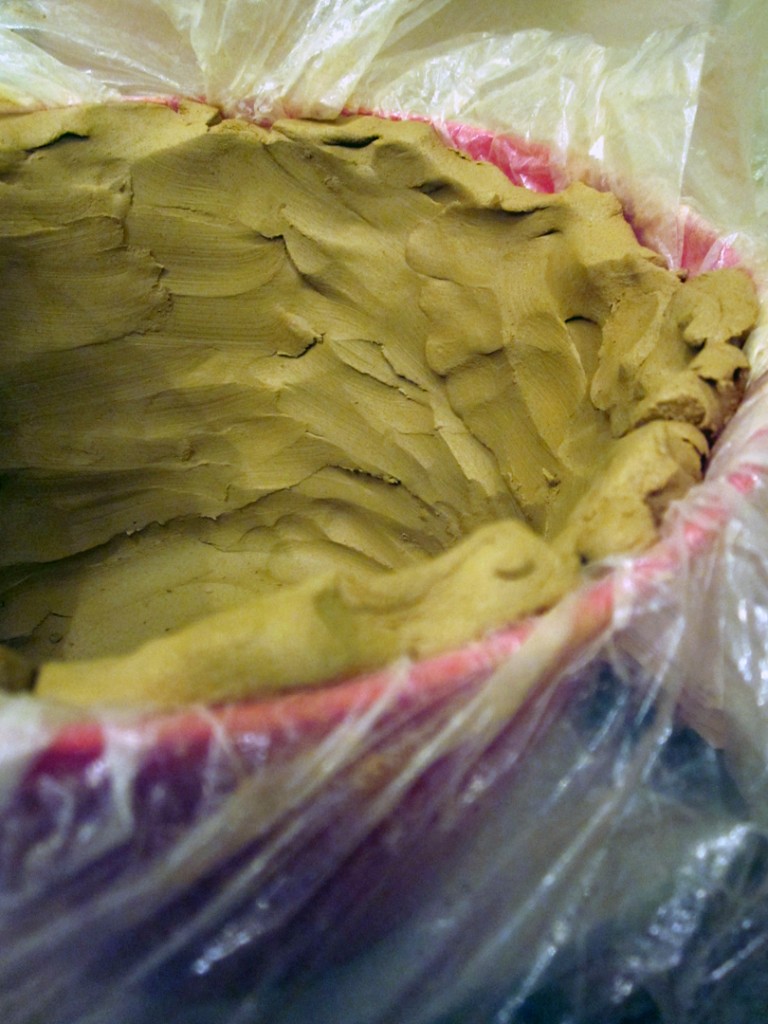
Oh boy! Wet clay, fresh out of the bag! The smell of it reminds me of vacations by Sierra lakes and rivers. Decomposed granite, water and rotting organics, mmmmmMMM!  This bag of lovely Sandstone Buff is from Quyle Kilns in the California Motherlode town of Murphys, so my nose is right on.

Fresh clay like this is sticky, mushy and makes great slime if you get it wetter. It takes any impression, any shape and, if it’s not piled too high or too thick – or if it’s supported – it holds as it dries. We’re not sure just how humans began to take advantage of the fact that clay changes in the fire,  but we know  that raw clay lined many Neolithic holes in the ground or baskets, the world over, and accidentally got baked hard. This particular feature of wet clay is a not-so-hidden agenda in the Beginning Ceramic Handbuilding class I’m currently teaching. First Project, after all the intros, handouts, clay studio tour and ground rules? The Press-Molded Wad Pot.

Forgive me a few more words and then onto the eye candy.

This way of using fresh clay is so obvious it’s almost NOT a clay handbuilding Official Method. At best it gets a sidebar or an “Also Try This” mention in the dozens of  books and websites I consulted for deeper understanding. Sometimes that mention is in the Coiling chapter, sometimes in the Slab working chapter. It doesn’t really get respect.

It deserves better and I’m giving it that because it’s a fabulous and supportive (pun intended) way to get comfortable with the forming properties of clay besides making lumpy mudpies. It  lets clay be clay and learners be learners. It directs attention to good clay skill-building: evenness, surfaces, top edges and drying, but keeps some training wheels on to help a thoughtful ceramic artist have the full experience AND a successful result. Here’s a pictorial walk through the only thing I’ve ever heard it called besides simple press molding: A Wad Pot.


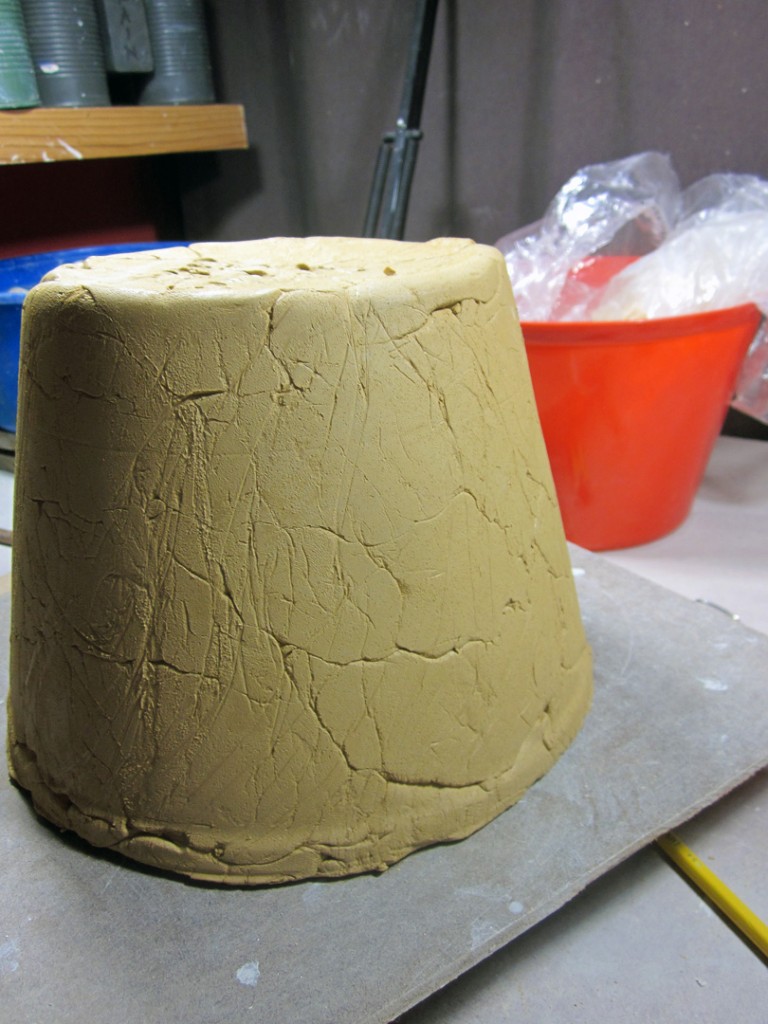
Get yourself some wet clay, about 5 pounds, any kind. Find a container with an even top rim, without undercuts – so your pot or bowl will slide straight out of it and not get caught – like this “Popcorn Bucket” from the local dollar store. You can also use traditional plaster or wood slump molds. You’ll need  some thin plastic if your container isn’t made of something porous that will release the clay. Gather a few rounded sticks or spoons as smoothing devices besides your fingers. And start in.

Open that bag of clay and inhale deeply, just because. If you need to, line your mold with the thin plastic. Don’t worry about how wrinkled or folded it is, that’s part of the texture the finished pot will enjoy. (And a little secret: you can remove this wrinkling later by smoothing the outside if you’re called to it.)

Grab a random-sized pinch of clay, maybe the size of a golf ball. Mush it around (aka: kneading). Pat it into a flattened shape,  1/2″ or  less thick and place it at the bottom of your mold. Do this over and over, lining the bottom and sides of your mold. Pressing the edges of each piece into the others, smoothing and linking the surface only as much as you want. Feel where the thick and thin places are and adjust accordingly. You will go back over it all when the mold is completely lined.

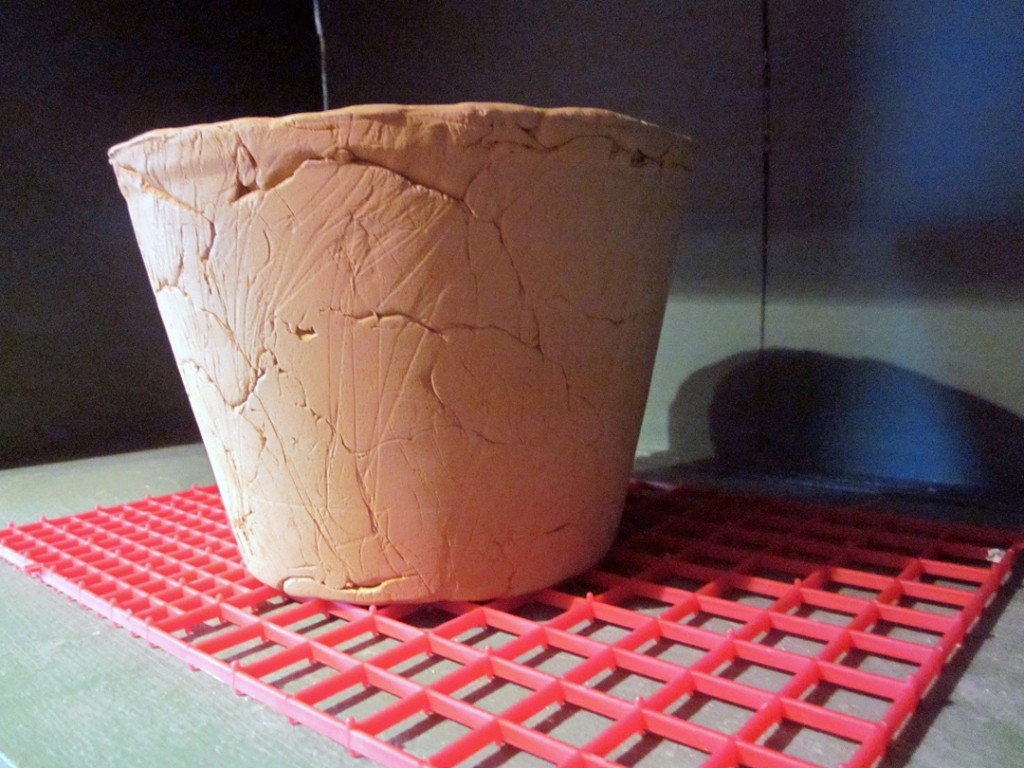
So, fast forward to a finished top rim edge, smoothed and strengthened, a bit of drying and an un-molding. Here’s what you’ve got:


See all those great creases and wrinkles? Leave them alone for a great natural surface…or smooth them with a rib if you must. Press the bottom in a little so it will sit evenly and sign it.

I’m thinking you left the outside alone, so here’s the bisque fired version, wrinkles intact.


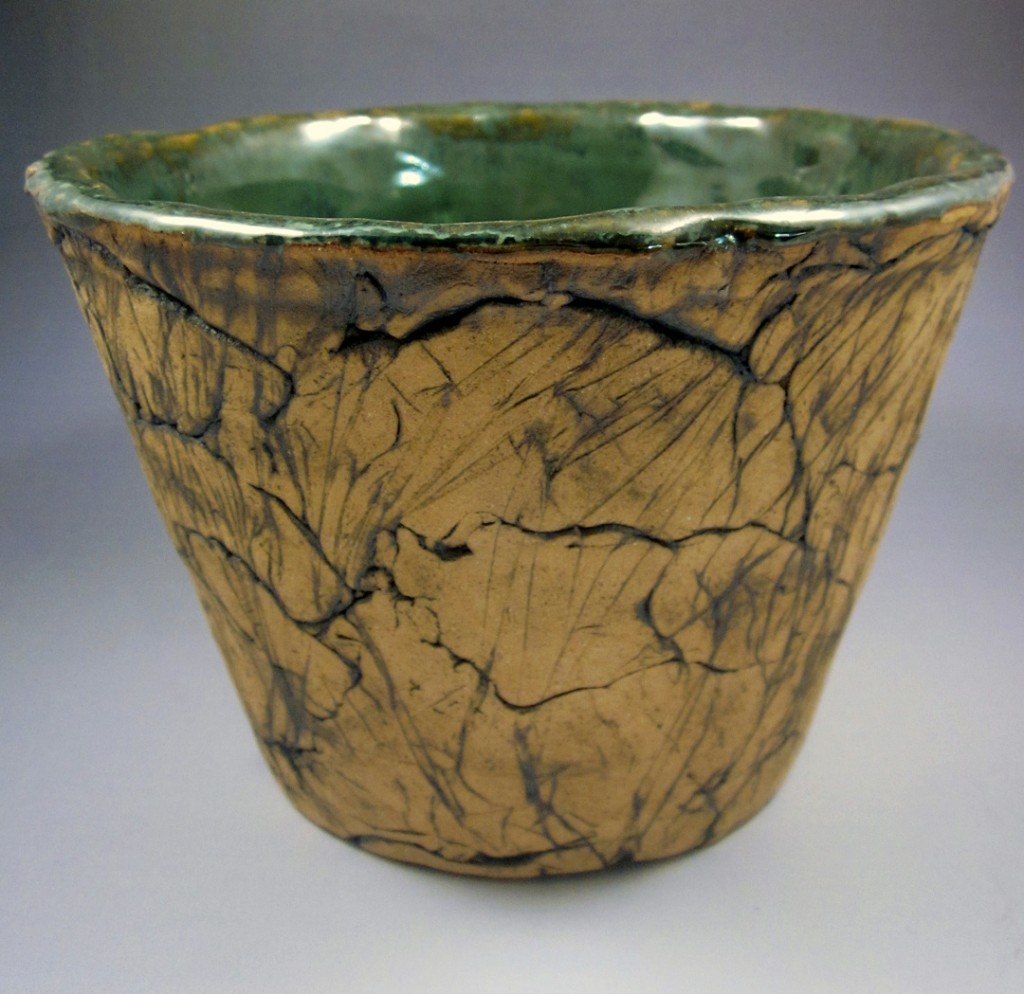
What serves to decorate this kind of pot and honor it’s hard-won (or is it hard-left-alone?) surface texture? How about a patina wash: thinned iron oxide wash brushed on and then lightly sponged off to leave it mostly in the cracks? It’s OK to glaze the smooth inside if you like. And that would look like this:


So, there you have it. An awesome and supportive first project for beginners….or anyone else needing a fairly assured way to make a pot. And quickly!

Variations are legion. Use different mold shapes. (Just make sure your clay will release easily.)  Use evenly rounded wads or coils or “floils” – flattened coils. Smooth the outside cracks. Add stuff to the top rim. Change the shape of the pot once it’s unmolded: square it up, push out from the inside, you know what to do. Don’t smooth the inside as much. Add handles or a top rim edging. The beat goes on.

As I finally get to posting this, my class is 2/3 over and going quite nicely. The second and third projects: Traditional Coiled Pueblo Pots and Pinched Japanese Style Teabowls have been introduced and students are working to finish and decorate to suit. More on the rest of the whole experience soon, of course.

Happy Clay Trails.


Share this: